
In this blog I'm going to spill the tea and tell you about five of my favorite, healthy Starbucks
Se næste indlæg >

Lower Back Pain | 3 Movements For INSTANT Lower Back Pain Relief
In this blog, I’ll show you three exercises that can instantly centralize, which means decrease, your lower back pain. They’re very simple and require almost no equipment. You can even do them at home!
What is Lower Back Pain?
If you are one of those people having lower back pain, you’re not alone. It’s one of the most common pains, and almost every adult will experience lower back pain at some point in their lifetime. Before I go into the meat of this blog, I want to just put in a quick disclaimer: If you have sudden intense low back pain that goes down your leg and it happened after some sort of trauma or accident, or if your pain increases when you do the exercises in this video, stop performing the exercises and please go see a doctor.
The three exercises I’m about to show you will help those of you who have a bulging disc, which is not the same as a herniated disc. So, a bulging disc is when the soft tissue inside one of the discs between your vertebrae is pushing out and irritating the nerve but hasn’t broken through the edge of the disc. However, if you have a herniated disc, that’s when the tissue inside has actually broken through the edge of the disc and is touching the nerve. If that’s the case, you need to go to a doctor. You might need surgery. Those of you that have the bulging disc, we can still make sure you don’t need surgery and that you can become pain-free. So these three exercises are for you guys.
What NOT to do when you have Lower Back Pain
If you have lower back pain, you might feel like stretching your back. That’s a phrase I hear all the time, but that is the LAST thing you want to do. Do not do any type of forward folds, rounding your lower spine in any way. Spinal flexion is actually making your pain and your issue worse. In doing that, we are pressing the soft tissue inside the disk out into the nerve.
After reading this blog, you can watch the video below where I take you through all the exercises step by step and also show you the three exercises you should NEVER do when you’re experiencing low back pain.
Exercises for Instant Lower Back Pain Relief
Instead of flexing your spine, you want to decompress the spine to make room inside your disc, to centralize the soft tissue and free the nerve so there’s no more pressure on it and you will be pain-free. And that takes us to Exercise 1, which is a decompression exercise.
Exercise 1: Hanging With Toes on the Floor (Decompression)
Want we want is to decompress the spine, pull the vertebrae a little bit apart to make room inside the disc for the soft tissue to come back to the center.
To do this exercise you need to find a pull-up bar or anywhere you can hang from, where your feet can still touch the floor. If you’re not tall enough to hang from a pull-up bar with your feet still on the floor, find a little chair or a bench or something to keep your feet on. It’s important that your feet are touching the floor the whole time. If they’re hanging, you’ll be tensing your hip flexors and your lower back will not relax.
So grab a pull-up bar, hang in both arms and keep your toes on the floor and completely relax your hips and abdominal muscles. Doing so, you should instantly feel a stretching sensation and relief in your low back. It should feel kind of nice. Hang here for 60 seconds or as long as you can.
Once you’ve decompressed the spine, you can go to the floor for the second exercise.

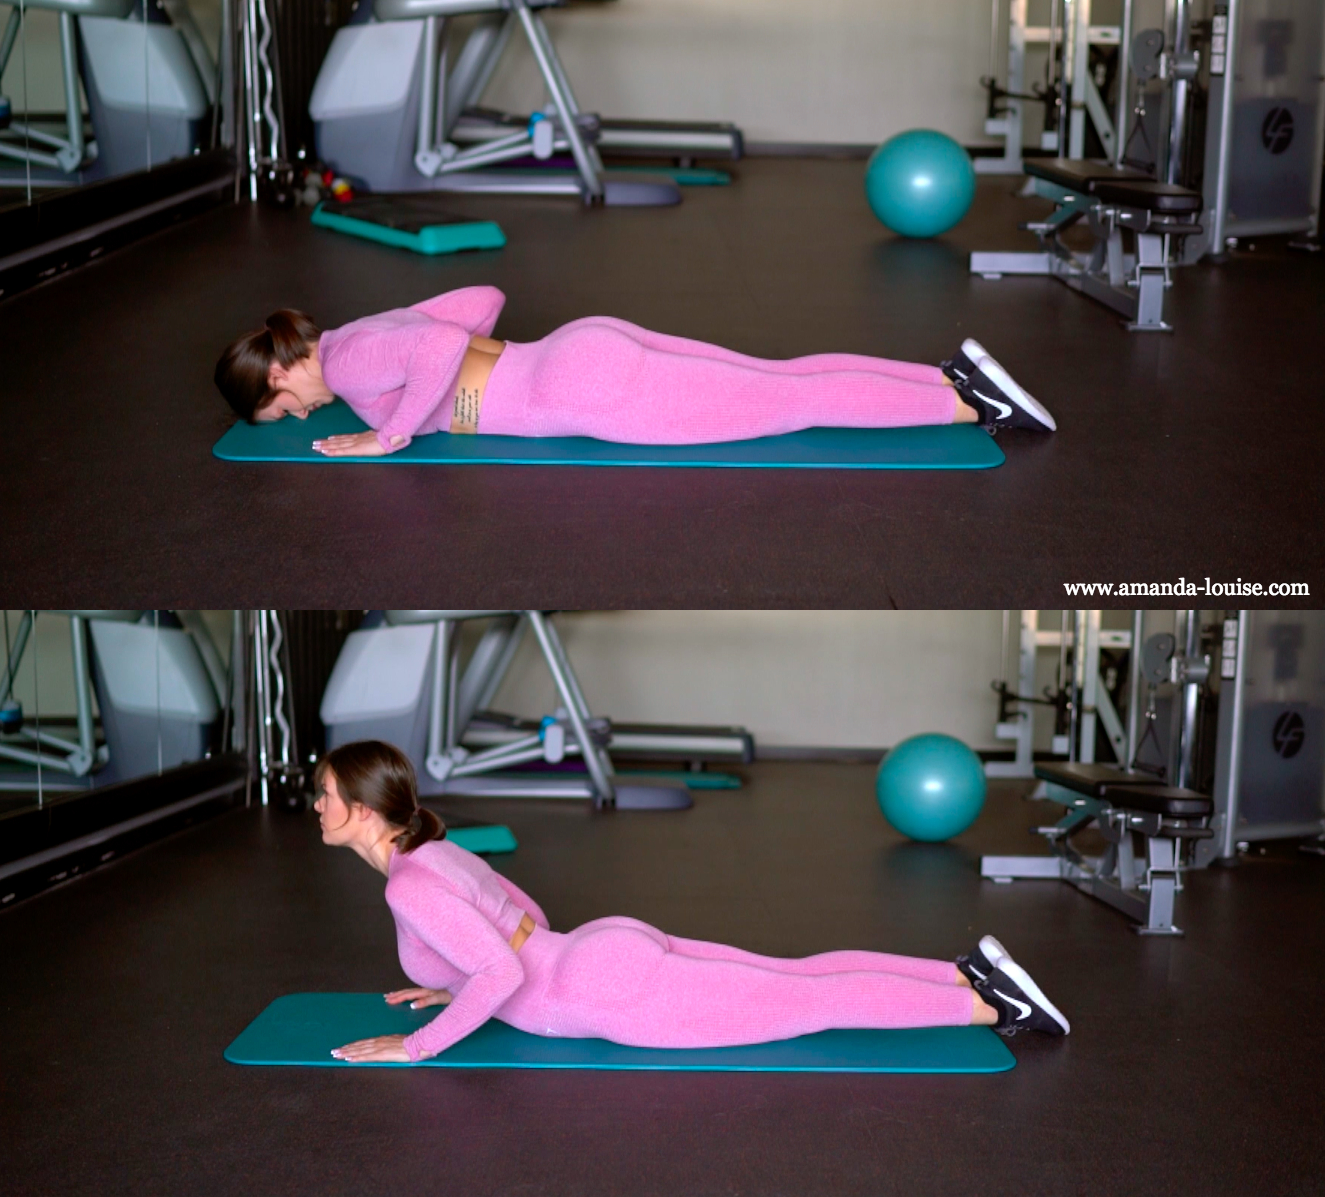
Exercise 2: Prone Back Extensions (Centralizing)
Exercise 2 is a prone back extension on the floor. You want to lie flat down, keep your feet together and have slight tension in your legs and glutes. Place your hands next to your chest and on your inhale, slowly lift up your chest and look up. Keep your hips on the floor. Don’t allow your hips to rise up from the floor. Stay up here for five seconds and then, slowly, lower back down on your exhale. Repeat this up to ten times in a row up to eight times a day.
You might find that every time you lift up, you are able to come up just a little bit higher without any pain.
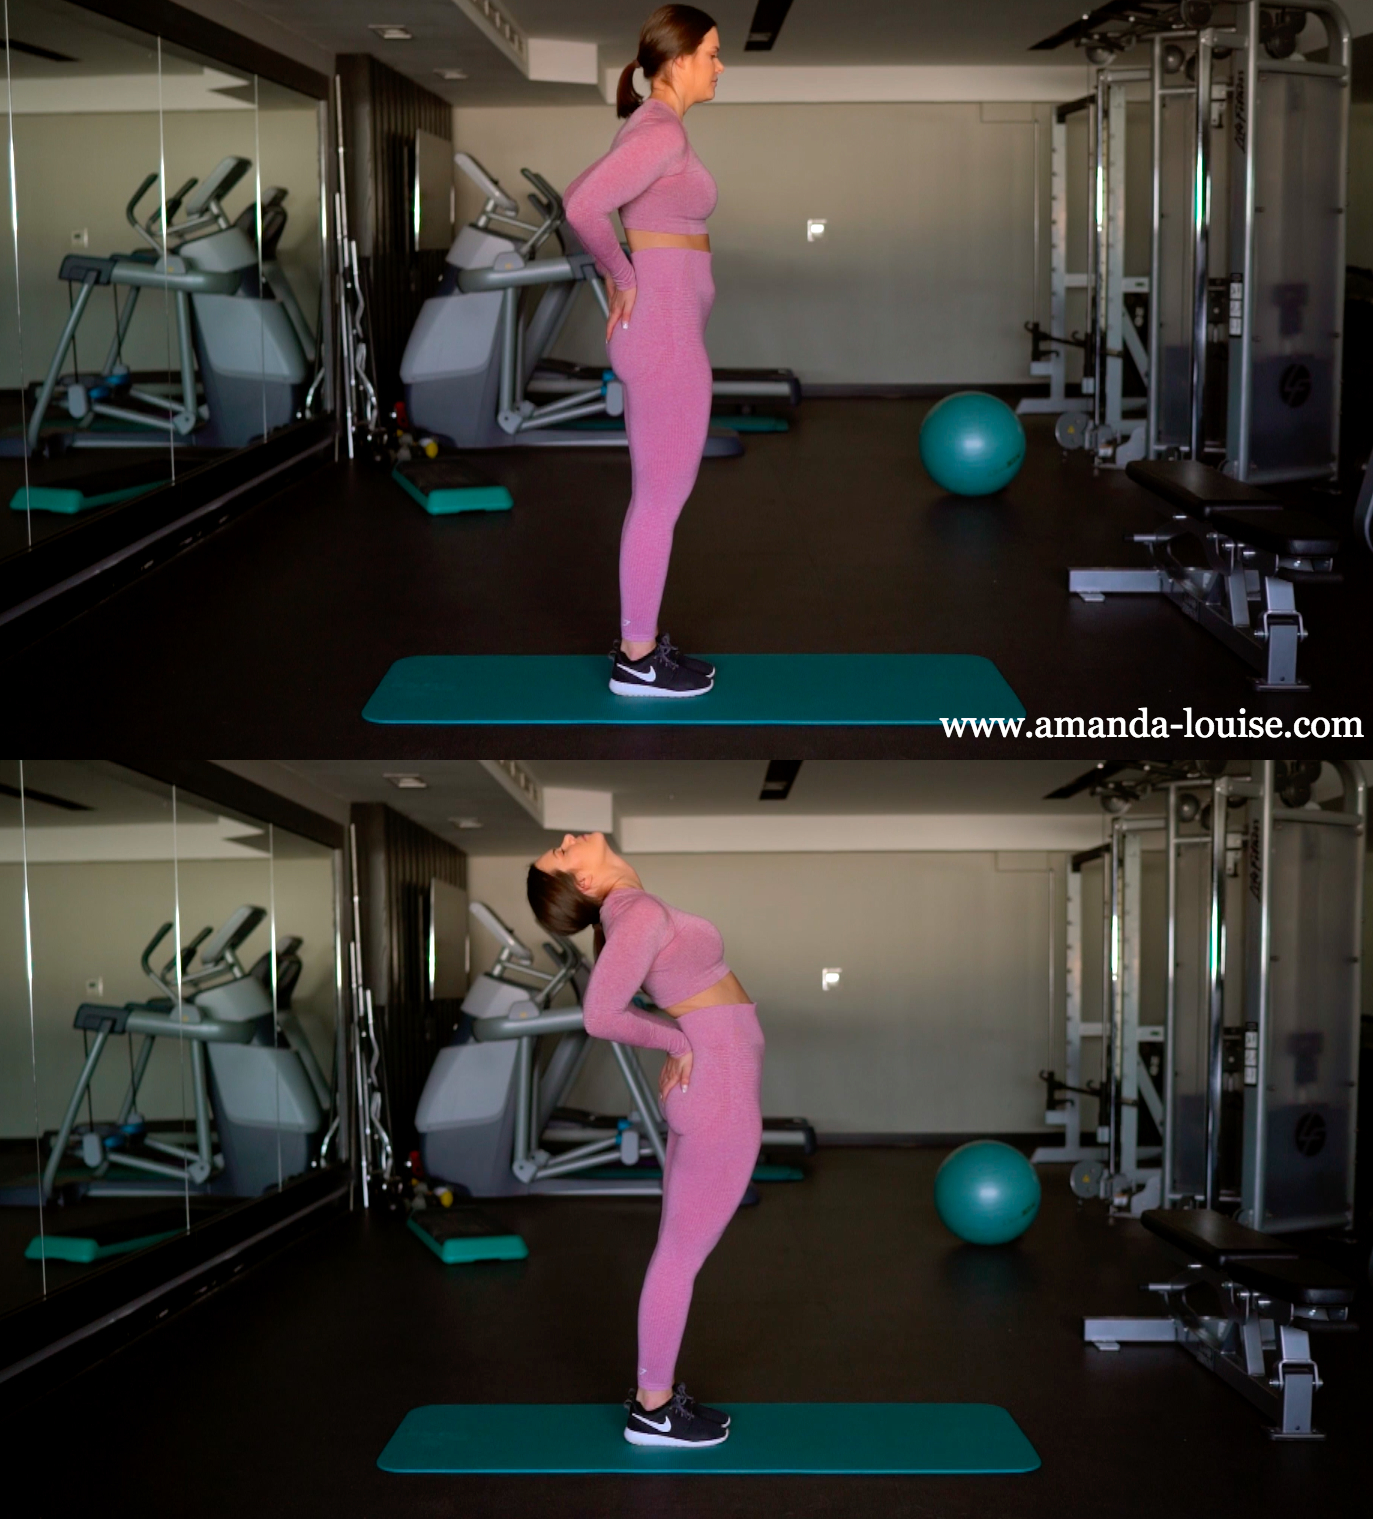
Exercise 3: Standing Back Extensions (Centralizing)
The third exercise I’m going to show you is quite similar to the second exercise, so you can do them both or you can stick to just one of them. Since the second one requires you to lie down on the floor, you’ll need a flat surface you want to lie down on. The third one here is a bit more versatile. You can do it wherever you are, if you’re standing in line at the grocery store, just walking around in the office… Anywhere. As the second exercise is less advanced and requires less body awareness, I recommend that one whenever possible, but again, this one is really good if you’re out and about, feeling that lower back pain and you just want fast relief here and now.
To to the Standing Back Extensions, you need to stand up, distribute your weight equally on both legs. Place your hands flat on the back of your lower back right on that where you can feel the pelvis starts. Take a deep breath in as you let your head fall back, and slowly, start arching your back. When you reach as far as you want to, stay here for up to five seconds. When you want to come back up you exhale and begin the return by lifting up your head. From there, slowly come back up with your whole body. Repeat this up to ten times in a row up to eight times a day.
Bonus Tip
And I have a bonus tip for you guys as well! The best thing you can do when you have low back pain due to a bulging disc is to lie on your stomach. So whenever you’re watching TV, whenever you’re lying in bed, try and be on your stomach as much as possible. You can even, especially if you’re watching TV, lie down on your stomach, come up on your elbows and lie in this position almost for as long as you want. Of course, if it starts to hurt, stop and get out of the position. This position really helps centralize that soft tissue inside your disc and bring it back where it belongs, away from the nerve.
If you follow the exercises described and illustrated in this blog, before you know it, your pain will be centralized and you’ll be pain-free and right back in the gym.
If you came this far, thank you so much for reading this blog! I hope you found it useful! If you have any questions, feel free to leave a comment and I’ll, get back to you as soon as possible!
You can also go to my Instagram and YouTube for more free content like this. Many people with lower back pain also have tight and weak hip flexors. If you think that you, maybe you’d want to read this blog where I share my workout program to Stretch and Strengthen Tight and Weak Hip Flexors.
And remember, train right, stay fit!

Kommentarer